Offices – Coalition Spawn
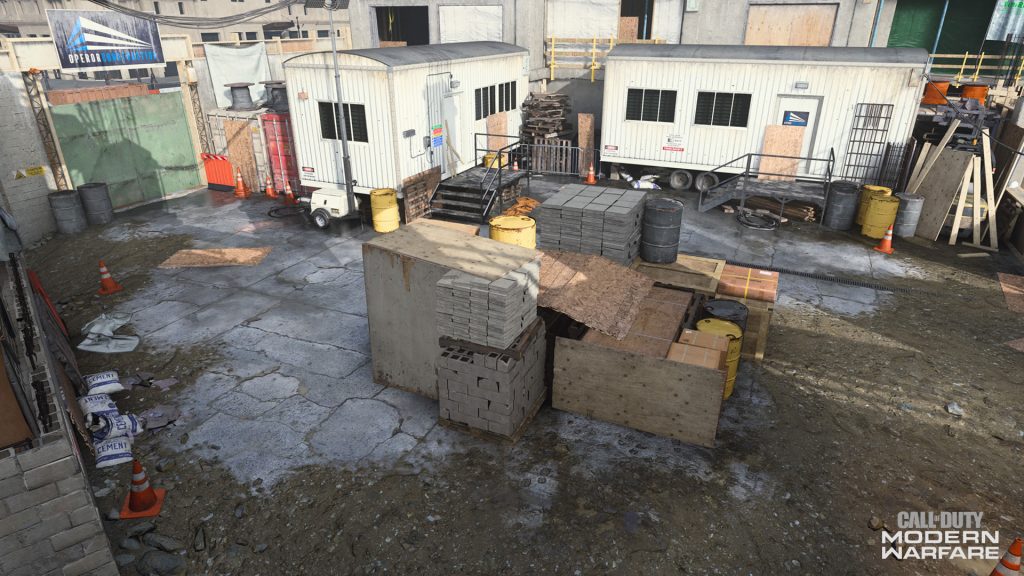
The first thing players will notice about Hardhat is the odd setup of the spawn areas. In most maps the spawn points only have one entrance and exit and are overlooked for the rest of the match. The spawns in Hardhat, however, are major junctions of the map and are often dangerous areas.
The Coalition team spawns between to two office buildings with access to the Pipes, Elevator Structure, and Support Beams areas of the map. Since the Offices are situated between heavy traffic areas, players should expect players rotating through this area throughout a match. The materials in the center of the area provide great cover while moving through or defending the office area, so make sure to use this to your advantage.
Elevator Structure

The Elevator Structure is situated between the Offices and Support Beams. The massive structure creates two lanes on either side that players can use to navigate to other areas of the map. Both are lanes are slightly inclined going towards the Offices, so keep this in mind if chasing an enemy.
There is also a concrete block near the path to the support beams which is a popular head glitch spot for players guarding the area. Make sure to clear this spot when rotating through the area and use it to your advantage when engaging the enemy.
Support Beams

The Support Beams area in Hardhat mainly serves as a junction between the Elevator Structure and the Dumpster area. There is not much cover for players to use so navigating the area quickly is the best strategy. This area also is one of the few locations on the map without overhead covering which means any type of airstrike will devastate players caught in the area.
Dumpster

The Dumpster area provides a vantage point with cover for players to cover the rotation from Support Beams. The cover may provide slight protection from the Support Beam area, but the back is still open to the Scaffolds Building. This area should be used as a place to catch your breath and reload before moving to another area and not as a place to stay for an extended period.
This area is also vulnerable to aerial killstreaks as there is no above cover and no places to hide.
Scaffolds Building

The Scaffolds Building in Hardhat has one of the best vantage points on the map that is perfect for snipers or players trying to finish longshot challenges.
A stack of crates provides a clear line of sight to the Bulldozer which is a major hotspot on the map. The bulldozer is also an objective location in several game modes which makes the Scaffolds Building an important area to hold. Keep an eye out for counter snipers, however, as the line of sight goes both ways.
Center Building

The Center Building serves a junction for the map with players constantly running through the area. There is vert little cover for players to use in the building which means players are usually fighting for their lives when entering the area.
The Center Building leads to Support Beams and Pipes area and is the quickest route to several objectives around the map. Players can hide in the corners near the entrances and get the drop on unsuspecting players, so clearing corners is mandatory to survive.
Players can climb the generator in the center of the room to get a vantage point on enemies but staying in this position for long is not recommended.
Close quarter weapons are best suited when traveling through the Center Building, but long ranged weapons are just as effective if the doors on both entrances are open.
Bulldozer

The Bulldozer is one of the most contested areas of the map. This location provides a great field of view into the area between the Pipes and Center Building but is also between to vantage points.
The Bulldozer lies directly between the Containers area and Scaffolds building which means enemies are constantly aiming at the bright yellow object. The Bulldozer is one of the harder areas to navigate and players should move quickly if they need to make it through the open area.
Utilities such as smoke grenades and should be used when trying to take objectives in the area as it will be exceedingly difficult to take objectives without cover.
Pipes

The Pipes area features a large pipe that players connects the area outside the Center Building and the SUV and Stairs Building. The pipe might be the most convenient way to get to the other areas, but it also constantly watched by players at both entrances.
The area outside the Center Building also provides a vantage point to cover the Bulldozer and one of the entrances to the main building. Players can cover the pipe entrance while another picks off enemies rotating if they work together.
This is also one of the most contested parts of the map and players should expect a fight when entering the Pipes area.
Concrete Formwork Building

The Concrete Formwork Building sits between the Offices and SUV areas and provides a decent amount of cover for players. The area overlooks one of the Pipes entrances and the first floor of the Stair Building which means players can get the drop on unsuspecting enemies below.
SUV

The SUV area serves as a buffer between the Stairs building and Concrete Formwork building. This area also looks down on the first floor of the Stairs Building and pipe entrance. Players pushing towards the SUV should make sure it is destroyed to avoid being an easy kill for an enemy who blows up the vehicle.
Stairs Building

The Stairs Building overlooks one of the Pipes entrances and has two levels for players to traverse. The second story has multiple angles for players to use on enemy players, but the stairway allows enemies to flank camping players.
The first floor is also the quickest route between spawn points which makes it a popular place for players looking for early round kills.
Cherry Picker

The Cherry Picker area is right next to the Stairs Building and provides a vantage point on the second floor of the building. There is also a lane on the outside of the building connecting the first floor of the Stairs Building and Containers Area. This lane has less cover, however, which makes pushing through Cherry Picker the best choice in most situations.
The wooden walls are penetrable by heavier weapons which means players are not completely safe in the building. Keep this in mind when using the area for cover.
Containers Area – Allegiance Spawn

The Containers Area serves as the spawn for the Allegiance team and is between Cherry Picker and the Bulldozer. This area also has a great sightline to cover the Bulldozer and counter players sniping from the Scaffolds Building.
This area is also unsafe once a match starts as players are moving through the area or using it to hold the Bulldozer.